2021. 3. 7. 21:39ㆍ개발/디자인패턴
Head First Design Patterns를 읽고 학습한 내용을 기록합니다.
0. 커맨드 패턴 정의
아래는 책에 쓰여있는 커맨드 패턴의 정의.
커맨드 패턴을 이용하면 요구 사항을 객체로 캡슐화 할 수 있으며, 매개변수를 써서 여러 가지 다른 요구 사항을 집어넣을 수도 있습니다. 또한 요청 내역을 큐에 저장하거나 로그로 기록할 수도 있으며, 작업취소 기능도 지원 가능합니다.
커맨드 패턴은 결과를 위한 계산과정의 각 부분들을 캡슐화 시킬 수 있다. 계산의 결과를 원하는 클라이언트는 사실 과정은 궁금하지 않고 결과만 올바르게 출력되면 된다.
이런 Needs에 의해 커맨드 패턴은 계산과정을 캡슐화하고, 클라이언트는 단순히 계산을 해달라는 명령만 수행함으로써 원하는 결과를 얻어낼 수 있다.
실습을 하면서 조금씩 이해도를 높여보도록 하자.
1. 생활 속 커맨드 패턴??
식당에서 손님이 주문을 한다고 생각해보자.
손님은 가게에서 주문서를 작성하고 웨이터에게 주문서를 넘긴다.
웨이터는 주문서를 받아서 주방으로 넘긴다.
주방장은 주문서를 보고 요리를 만든다.
위 예시를 보면 손님은 주문만 할뿐 그 이후는 어떻게 되는지 알지 못하고 알 필요도 없다. 그냥 음식만 주문한대로 나오기만 하면된다.
웨이터는 손님에게 주문서를 받고 주방장에게 넘기기만 하면된다. 요리를 어떤식으로 하든 상관없다. 그냥 음식만 나오면 된다.
요리사는 밖에서 무슨일이 있던지 그냥 주문서에 있는 내용대로 요리만 하면된다. 어떤 고객이 주문을 했는지는 전혀 상관없다.
위를 좀더 함수(?) 스럽게 작성해보면
손님은 createOrder 메소드를 호출한다. (아마 메소드를 호출할때 자신이 주문한 내용을 담은 객체를 파라미터로 전달할것이다. )
웨이터는 주문을 접수하고, orderUp 메소드를 호출한다.
주문서를 받은 주방장은 주문서에 따라 makeFood 메소드를 실행한다.
손님부터 주방장까지 연결된 동작이지만 자신이 필요한 결과를 요청(명령)만 할뿐 그 과정에 대해서는 알지 못한다. ( = 각 인물들의 동작은 분리되어있다. )
2. 리모컨 만들기
커맨드 패턴을 적용해서 리모컨을 하나 만들어 보자.
만들 리모컨에는 (아직까지는)불을 켜기 위한 버튼이 하나있다. 버튼의 기능을 구현해보자.
먼저 명령 실행을 위한 Command 인터페이스를 하나 만들었다.
|
1
2
3
|
public interface Command{
public void execute();
}
|
cs |
불을켜기 위한 클래스인 LightOnCommand를 구현한다.
생성자를 통해 light 객체를 셋팅한다.
불을 켜기위한 동작을 light.on으로 직접 수행하지 않도록 하기위해 Command 인터페이스의 구현 메소드인 execute를 통해서 하도록한다.
|
1
2
3
4
5
6
7
8
9
10
11
12
|
public class LightOnCommand implements Command{
Light light;
public LightOnCommand(Light light){
this.light = light;
}
public void execute(){
light.on();
}
}
|
cs |
Line 8~9 : execute 메소드를 구현한 덕분에 외부에서는 불을 켜기위해 light객체의 on을 꼭 알아야 할 필요가 없어졌다. 그냥 execute()메소드만 호출하면 알아서 불을 켜준다.
이제 명령을 실행하기 위한 리모컨 클래스를 만들어보자.
이름은 SimpleRemoteControl으로 지었다.
|
1
2
3
4
5
6
7
8
9
10
11
12
13
14
|
public class SimpleRemoteControl{
Command slot;
public SimpleRemoteControl(){}
public void setCommand(Command command){
slot = command;
}
public void buttonWasPressed(){
slot.execute();
}
}
|
cs |
Line 6~8 : setCommand을 통해서 명령을 주입받는다. ( LightOnCommand의 인스턴스가 들어올것이다. )
Line 10~12 : 외부에서 buttonWasPressed()를 호출하면 주입받은 command 객체의 execute 메소드를 실행한다.
테스트를 해보자.
|
1
2
3
4
5
6
7
8
9
10
11
|
public class RemoteControlTest{
public static void main(String[] args){
SimpleRemoteControl remote = new SimpleRemoteControl();
Light light = new Light();
LightOnCommand lightOn = new LightOnCommand(light);
remote.setCommand(lightOn);
remote.buttonWasPressed();
}
}
|
cs |
Line 3 : SimpleRemoteControl을 인스턴스화 한다. ( = 사용가능한 리모컨을 하나 만든다. )
Line 4 : Light 클래스를 인스턴스화 한다. ( = 리모컨의 버튼에 의해 제어 될 전등을 선택한다. )
Line 5 : LightOnCommand를 인스턴스화한다. ( = Line4에 선택한 전등의 각종 기능을 실행할 수 있다. 아직은 전등 켜기 기능 밖에 없다. )
Line 7 : 리모컨의 버튼에 Line5에서 만든 명령집을 주입한다.
Line 8 : 리모컨의 버튼을 누른다.
3. 커맨드 패턴의 클래스 다이어그램
2장에서 작성한 클래스들은 각각의 기능을 가지고 있다. 책에선 기능별로 클래스에 특정한 이름을 붙여서 설명한다.
LightOnCommand 클래스 : 커맨드(Command) - 리모컨에 의해 실행되는 명령
SimpleRemoteControl 클래스 : 인보커(Invoker) - 명령을 발생시키는 리모컨
Light 클래스 : 리시버(Receiver) - 명령을 받는 전등
커맨드 클래스는 특정 행동(execute메소드)과 리시버(Lihgt) 사이를 연결하는 기능을 하는 클래스.
인보커 클래스는 명령이 들어있으며 execute 메소드를 통해 커맨드에게 특정 작업을 수행해달라고 요청하는 기능을 수행하는 클래스.
리시버 클래스는 요구사항( light.on()호출 )을 처리하기 위한 어떤일을 해야하는지 알고 있는 클래스.
커맨드 패턴의 클래스 다이어그램을 그려보면 아래와 같다.

2장에서 작성한 코드를 보고 왔기때문에 그냥 봤을때 보다 이해가 훨씬 쉽다.
Client( 2장에서 작성한 RemoteControlTest 클래스 )는 ConcreteCommand(2장에서 작성한 LightOnCommand 클래스)를 생성하고, Receiver(Light 클래스)를 설정한다.
4. 발전된 리모컨 만들기
이전까지 만들었던 리모컨에는 전등켜기 기능밖에 없다.
리모컨을 좀 더 발전시켜 거실전등,오디오 등 다양한 리시버들이 명령어를 수행할수 있도록 해보자.
책에선 리모컨에 총 14개( 켜기 7개 , 끄기 7개 )의 버튼이 존재하고, 각 버튼마다 명령어를 할당한다.
하지만 코드량이 많아져서 여기선 버튼 4개(켜기2개, 끄기 2개 )에만 명령어를 할당 해보자.
먼저 리시버에 대한 클래스를 작성한다. 나는 전등과 스테레오를 작성했다.
먼저 Light(전등) 클래스.
|
1
2
3
4
5
6
7
8
9
10
11
12
13
14
15
16
17
18
19
|
public class Light {
String location;
public Light(String location) {
this.location = location;
}
public void on() {
System.out.println("Light is on");
}
public void off() {
System.out.println("Light is off");
}
}
|
cs |
메소드를 통해 기능을 확인할 수 있다. 켜기(on)와 끄기(off)을 수행할 수 있다.
Stereo(전축) 클래스.
|
1
2
3
4
5
6
7
8
9
10
11
12
13
14
15
16
17
18
19
20
21
22
23
24
25
26
27
28
29
30
|
public class Stereo {
String location;
public Stereo(String location) {
this.location = location;
}
public void on() {
System.out.println(location + " stereo is on");
}
public void off() {
System.out.println(location + " stereo is off");
}
public void setCD() {
System.out.println(location + " stereo is set for CD input");
}
public void setDVD() {
System.out.println(location + " stereo is set for DVD input");
}
public void setRadio() {
System.out.println(location + " stereo is set for Radio");
}
}
|
cs |
전등 보다는 다양한 기능을 가지고 있다. CD셋팅(setCD 메소드)이나 DVD셋팅(setDVD 메소드)같은 기능들이 추가로 존재한다.
명령 수행 메소드를 통일하기 위한 Command 인터페이스를 생성한다.
|
1
2
3
4
5
|
public interface Command {
public void execute();
}
|
cs |
Command 인터페이스를 구현하는 NoCommand 클래스.
|
1
2
3
4
5
6
|
public class NoCommand implements Command{
public void execute() {
// 공백
}
}
|
cs |
execute 메소드를 초기화 할때 사용한다. 앞으로 구현할 코드를 보면 이해하기 쉽다.
Command 인터페이스를 구현하면서 전등 켜기, 끄기 기능을 위한 커맨드 클래스를 작성한다.
|
1
2
3
4
5
6
7
8
9
10
11
12
13
14
15
|
public class LightOnCommand implements Command {
Light light;
public LightOnCommand(Light light) {
this.light = light;
}
public void execute() {
light.on();
}
public void undo() {
light.off();
}
}
|
cs |
|
1
2
3
4
5
6
7
8
9
10
11
12
13
14
15
16
|
public class LightOffCommand implements Command {
Light light;
public LightOffCommand(Light light) {
this.light = light;
}
public void execute() {
light.off();
}
public void undo() {
light.on();
}
}
|
cs |
마찬가지로 전축 켜기, 끄기 명령을 위한 커맨드 클래스를 작성한다. 전축 켜기는 전등 켜기보다는 조금 복잡한 모습이다.
|
1
2
3
4
5
6
7
8
9
10
11
12
13
14
15
16
17
18
19
20
|
public class StereoOnWithCDCommand implements Command {
Stereo stereo;
public StereoOnWithCDCommand(Stereo stereo) {
this.stereo = stereo;
}
public void execute() {
stereo.on();
stereo.setCD();
}
public void undo() {
stereo.off();
}
}
|
cs |
|
1
2
3
4
5
6
7
8
9
10
11
12
13
14
15
16
17
|
public class StereoOffCommand implements Command {
Stereo stereo;
public StereoOffCommand(Stereo stereo) {
this.stereo = stereo;
}
public void execute() {
stereo.off();
}
public void undo() {
stereo.on();
}
}
|
cs |
이제 인보커(리모컨) 클래스를 만들어 보자.
|
1
2
3
4
5
6
7
8
9
10
11
12
13
14
15
16
17
18
19
20
21
22
23
24
25
26
27
28
29
30
31
32
33
34
35
36
37
38
39
40
41
42
43
44
45
46
47
48
49
50
51
|
public class RemoteControl {
Command[] onCommands;
Command[] offCommands;
public RemoteControl() {
onCommands = new Command[7];
offCommands = new Command[7];
// execute 메소드가 공백인 NoCommand인스턴스 생성
Command noCommand = new NoCommand();
//모든 명령을 초기화한다.
for(int i=0; i<7; i++) {
onCommands[i] = noCommand;
offCommands[i] = noCommand;
}
}
// slot번째 줄에있는 버튼들에 명령어 할당하기
public void setCommand(int slot, Command onCommand, Command offCommand) {
onCommands[slot] = onCommand;
offCommands[slot] = offCommand;
}
// slot번째 줄에 있는 버튼 중 "켜기"버튼을 클릭한 경우
public void onButtonWasPushed(int slot) {
onCommands[slot].execute();
}
// slot번째 줄에 있는 버튼 중 "끄기"버튼을 클릭한 경우
public void offButtonWasPushed(int slot) {
offCommands[slot].execute();
}
// 출력을 위한 메소드
public String toString() {
StringBuffer stringBuff = new StringBuffer();
stringBuff.append("\n------ Remote Control -------\n");
for (int i = 0; i < onCommands.length; i++) {
stringBuff.append("[slot " + i + "] " + onCommands[i].getClass().getName()
+ " " + offCommands[i].getClass().getName() + "\n");
}
return stringBuff.toString();
}
}
|
cs |
Line 6~7 : 총 14개의 버튼이 존재하기 때문에 켜기 7개 , 끄기 7개를 수행할 Command 인스턴스를 생성한다.
Line 12~15 : noCommand 인스턴스를 이용해 모든 버튼의 execute 메소드를 초기화 한다.
Line 20~24 : 입력받은 slot번째에 켜기와,끄기 Command를 각각 주입받는다. ( 1개의 슬롯에 버튼이 2개씩 있다고 가정했다. )
Line 27~29 : slot번째에 있는 켜기 버튼을 실행한다.
Line 32~35 : slot번째에 있는 끄기 버튼을 실행한다.
Line 39~47 : 현재 인보커에 매핑된 명령어를 조회하기 위한 메소드다.
리모컨도 만들었고, 리모컨에 할당할 명령도 모두 만들었다.
이제 리모컨의 버튼에 명령어를 할당하고 테스트 해보자.
|
1
2
3
4
5
6
7
8
9
10
11
12
13
14
15
16
17
18
19
20
21
22
23
24
25
26
27
28
29
30
31
32
33
34
35
36
37
38
|
public class RemoteLoader {
public static void main(String[] args) {
RemoteControl remoteControl = new RemoteControl();
// 전등과 전축 인스턴스를 만들며 위치 정보를 생성자를 통해 넘겨준다.
Light kitchenLight = new Light("kitchen");
Stereo livingRoomSetreo = new Stereo("livingRoom");
// 전등에 on,off시 수행 해야할 동작을 주입한다.
LightOnCommand kitchenLightOn = new LightOnCommand(kitchenLight);
LightOffCommand kitchenLightOff = new LightOffCommand(kitchenLight);
// 전축에 on,off시 수행 해야할 동작을 주입힌다.
StereoOnWithCDCommand stereoOnWithCD = new StereoOnWithCDCommand(livingRoomStereo);
StereoOffCommand stereoOff = new StereoOffCommand(livingRoomStereo);
// 리모컨의 0번째 슬롯의 버튼에는 주방 전등의 on,off에 대한 명령을 셋팅한다.
remoteControl.setCommand(0, kitchenLightOn, kitchenLightOff);
// 리모컨의 1번째 슬롯 버튼에는 거실 전축의 on,off에 대한 명령을 셋팅한다.
remoteControl.setCommand(1, stereoOnWithCD, stereoOff);
System.out.print("리모컨 버튼 매핑 보기");
System.out.println(remoteControl);
System.out.println("명령수행 해보기");
remoteControl.onButtonWasPushed(0);
remoteControl.offButtonWasPushed(0);
remoteControl.onButtonWasPushed(1);
remoteControl.offButtonWasPushed(1);
}
}
|
cs |
주석에서 알수 있듯이 먼저 리시버(전등,전축) 인스턴스를 생성한다.
그리고 각 리시버들을 커맨드 클래스에 주입한다.
커맨드를 리모컨의 slot에 셋팅하고 테스트를 수행한다.
결과는 아래와 같다. 나머지 5개의 슬롯에는 명령어를 할당하지 않았기 때문에 NoCommand 인스턴스가 출력된다.

5. 리모컨에 Undo 기능 추가하기
Undo 버튼을 누르면 직전 상태로 되돌아 갈 수 있도록해보자.
리모컨에 Undo기능이 가능한 선풍기 풍향 조절을 위한 버튼을 추가해보자.
먼저 Command 인터페이스에 Undo를 위한 메소드를 정의한다. (사실 Command 인터페이의 메소드 정의를 추가하면 4장에서 작성한 커맨드 클래스들이 모두 수정되어야 한다. 다만, 난이도 자체가 어렵지 않아서 이번 포스팅에선 생략한다. )
|
1
2
3
4
|
public interface Command {
public void execute();
public void undo();
}
|
cs |
|
1
2
3
4
5
6
|
public class NoCommand implements Command{
public void execute() { }
public void undo() { }
}
|
cs |
NoCommand 클래스도 undo 메소드를 초기화하기 위한 메소드를 구현했다.
리시버(선풍기) 클래스를 작성한다. 바람세기 조절을 위한 high, medium, low 메소드를 구현했다.
|
1
2
3
4
5
6
7
8
9
10
11
12
13
14
15
16
17
18
19
20
21
22
23
24
25
26
27
28
29
30
31
32
33
34
35
36
37
38
39
40
41
|
public class CeilingFan {
public static final int HIGH = 3;
public static final int MEDIUM = 2;
public static final int LOW = 1;
public static final int OFF = 0;
String location;
int speed;
public CeilingFan(String location) {
this.location = location;
}
public void high() {
// turns the ceiling fan on to high
speed = HIGH;
System.out.println(location + " ceiling fan is on high");
}
public void medium() {
// turns the ceiling fan on to medium
speed = MEDIUM;
System.out.println(location + " ceiling fan is on medium");
}
public void low() {
// turns the ceiling fan on to low
speed = LOW;
System.out.println(location + " ceiling fan is on low");
}
public void off() {
// turns the ceiling fan off
speed = OFF;
System.out.println(location + " ceiling fan is off");
}
public int getSpeed() {
return speed;
}
}
|
cs |
리모컨에서 선풍기 바람세기를 high로 하는 버튼을 클릭했을때 수행할 명령을 구현한다. ( medium,low도 같은 방식으로 구현하면 된다. )
|
1
2
3
4
5
6
7
8
9
10
11
12
13
14
15
16
17
18
19
20
21
22
|
public class CeilingFanHighCommand implements Command {
CeilingFan ceilingFan;
int prevSpeed;
public CeilingFanHighCommand(CeilingFan ceilingFan) {
this.ceilingFan = ceilingFan;
}
public void execute() {
prevSpeed = ceilingFan.getSpeed(); // high로 변경하기전 현재 상태를 기록함
ceilingFan.high();
}
public void undo() {
// 이전의 속도로 되돌린다.
switch (prevSpeed) {
case CeilingFan.HIGH: ceilingFan.high(); break;
case CeilingFan.MEDIUM: ceilingFan.medium(); break;
case CeilingFan.LOW: ceilingFan.low(); break;
default: ceilingFan.off(); break;
}
}
}
|
cs |
Line 9 : 바람의 세기를 high로 바꾸기 전에 현재 상태를 prevSpeed 변수에 저장한다.
Line 12 ~ 20 : undo 명령이 실행되면 이전 속도로 되돌린다.
undo 기능을 리모컨(인보커)에 탑재해보자.
|
1
2
3
4
5
6
7
8
9
10
11
12
13
14
15
16
17
18
19
20
21
22
23
24
25
26
27
28
29
30
31
32
33
34
35
36
37
38
39
40
41
42
43
44
45
46
47
48
49
50
51
52
53
54
55
56
57
58
59
60
|
public class RemoteControl {
Command[] onCommands;
Command[] offCommands;
Command undoCommand; // Command 객체를 생성한다.
public RemoteControl() {
onCommands = new Command[7];
offCommands = new Command[7];
// execute 메소드가 공백인 NoCommand인스턴스 생성
Command noCommand = new NoCommand();
//모든 명령을 초기화한다.
for(int i=0; i<7; i++) {
onCommands[i] = noCommand;
offCommands[i] = noCommand;
}
undoCommand = noCommand; // undoCommand를 초기화한다.
}
// slot번째 줄에있는 버튼들에 명령어 할당하기
public void setCommand(int slot, Command onCommand, Command offCommand) {
onCommands[slot] = onCommand;
offCommands[slot] = offCommand;
}
// slot번째 줄에 있는 버튼 중 "켜기"버튼을 클릭한 경우
public void onButtonWasPushed(int slot) {
onCommands[slot].execute();
undoCommand = onCommands[slot]; // 발생한 명령 인스턴스를 undoCommand에 셋팅한다.
}
// slot번째 줄에 있는 버튼 중 "끄기"버튼을 클릭한 경우
public void offButtonWasPushed(int slot) {
offCommands[slot].execute();
undoCommand = offCommands[slot]; // 발생한 명령 인스턴스를 undoCommand에 셋팅한다.
}
// 리모컨에서 undo 버튼이 클릭되었을때 실행된다.
public void undoButtonWasPushed() {
undoCommand.undo(); // 가장 마지막에 사용된 명령어 인스턴스의 undo 메소드를 실행한다.
}
// 출력을 위한 메소드
public String toString() {
StringBuffer stringBuff = new StringBuffer();
stringBuff.append("\n------ Remote Control -------\n");
for (int i = 0; i < onCommands.length; i++) {
stringBuff.append("[slot " + i + "] " + onCommands[i].getClass().getName()
+ " " + offCommands[i].getClass().getName() + "\n");
}
return stringBuff.toString();
}
}
|
cs |
Line 4 : 가장 마지막에 실행된 명령어 인스턴스를 담기위한 Command 객체를 생성한다.
Line 18 : undoCommand 메소드를 초기화한다.
Line 32,38 : 현재 발생한 명령어 인스턴스를 undoCommand에 저장한다.
Line 42~44 : 리모컨(인보커)에서 undo 명령어가 실행되었을때 undoCommand에 있는 undo 메소드를 실행 하도록 한다.
테스트 해보자.
|
1
2
3
4
5
6
7
8
9
10
11
12
13
14
15
16
17
18
19
20
21
22
23
24
25
26
27
28
29
30
31
32
33
34
35
36
37
38
39
|
public class RemoteLoader {
public static void main(String[] args) {
RemoteControl remoteControl = new RemoteControl();
CeilingFan ceilingFan = new CeilingFan("livingRoom");
// 바람세기 Medium,High와 종료 명령어 인스턴스를 만들었다.
CeilingFanMediumCommand ceilingFanMedium =
new CeilingFanMediumCommand(ceilingFan);
CeilingFanHighCommand ceilingFanHigh =
new CeilingFanHighCommand(ceilingFan);
CeilingFanOffCommand ceilingFanOff =
new CeilingFanOffCommand(ceilingFan);
// 0번째 slot에는 바람세기 Medium과 전원 끄기 명령을 셋팅한다.
remoteControl.setCommand(0, ceilingFanMedium, ceilingFanOff);
// 1번째 slot에는 바람세기 High와 전원 끄기 명령을 셋팅한다.
remoteControl.setCommand(1, ceilingFanHigh, ceilingFanOff);
remoteControl.onButtonWasPushed(0);
remoteControl.offButtonWasPushed(0);
System.out.println("");
System.out.println("===>undo 수행 - off를 취소하고 Medium으로 돌아감");
remoteControl.undoButtonWasPushed();
remoteControl.onButtonWasPushed(1);
System.out.println("");
System.out.println("===>undo 수행 - High를 취소하고 Medium으로 돌아감");
remoteControl.undoButtonWasPushed(); // High로 했지만 취소되고 Medium으로 돌아왔다.
}
}
|
cs |
결과를 확인해보자. onButtonWasPushed 메소드가 실행될때마다 이전 작업을 취소하고 그 전 상태로 선풍기를 셋팅한다.

6. 리모컨에 매크로 기능 추가하기
모든 전원을 한번에 On, Off 하는 매크로 기능을 추가해보자.
리모컨에 해당기능을 탑재하기 위해 명령 클래스를 하나 만든다.
|
1
2
3
4
5
6
7
8
9
10
11
12
13
14
15
16
17
18
19
20
21
22
23
|
public class MacroCommand implements Command{
Command[] commands;
public MacroCommand(Command[] commands) {
this.commands = commands;
}
public void execute() {
// commands 배열에 들어있는 모든 명령의 execute 메소드를 실행한다.
for (int i = 0; i < commands.length; i++) {
commands[i].execute();
}
}
public void undo() {
// commands 배열에 들어있는 모든 명령의 undo 메소드를 실행한다.
for (int i = 0; i< commands.length; i++) {
commands[i].undo();
}
}
}
|
cs |
Line 8~13 : execute 메소드를 실행하면 commands 배열에 들어있는 모든 명령어 인스턴스의 execute 메소드를 실행하도록한다.
Line 16~21 : 반대로 commands 배열에 들어있는 모든 명령어 인스턴스의 undo 메소드를 실행하도록한다.
테스트 해보자.
|
1
2
3
4
5
6
7
8
9
10
11
12
13
14
15
16
17
18
19
20
21
22
23
24
25
26
27
28
29
30
31
32
33
34
35
36
37
38
39
40
|
public class RemoteLoader {
public static void main(String[] args) {
RemoteControl remoteControl = new RemoteControl();
Light livingRoomLight = new Light("livingRoom");
Stereo livingRoomStereo = new Stereo("livingRoom");
// 전등에 on,off시 수행 해야할 동작을 주입한다.
LightOnCommand kitchenLightOn = new LightOnCommand(livingRoomLight);
LightOffCommand kitchenLightOff = new LightOffCommand(livingRoomLight);
// 전축에 on,off시 수행 해야할 동작을 주입힌다.
StereoOnWithCDCommand stereoOnWithCD = new StereoOnWithCDCommand(livingRoomStereo);
StereoOffCommand stereoOff = new StereoOffCommand(livingRoomStereo);
// On 명령어 배열을 만든다.
Command[] allOn = { kitchenLightOn , stereoOnWithCD };
// Off 명령어 배열을 만든다.
Command[] allOff = { kitchenLightOff , stereoOff };
// 리모컨에 탑재하기 위한 명령어 클래스에 담는다
MacroCommand allOnMacro = new MacroCommand(allOn);
MacroCommand allOffMacro = new MacroCommand(allOff);
remoteControl.setCommand(0, allOnMacro, allOffMacro);
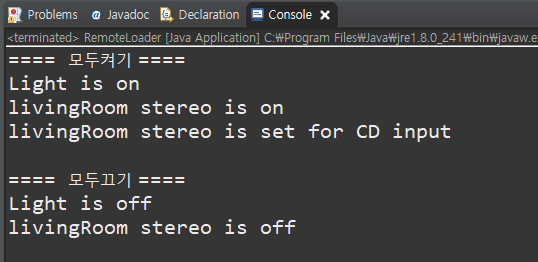
System.out.println("==== 모두켜기 ====");
remoteControl.onButtonWasPushed(0);
System.out.println();
System.out.println("==== 모두끄기 ====");
remoteControl.offButtonWasPushed(0);
}
}
|
cs |
Line 15까지는 전등,전축을 리시버를 생성하고, 리모컨에 탑재할 수 있는 명령어 인스턴스 형태로 만들었다.
Line 18 , 20 : 일괄 적용을 위해서 주제별로 명령어를 묶는다. 매크로 기능을 구현하고 있으므로 On과 Off 를 기준으로 배열을 구분했다.
Line 23~24 : 이제 명령어의 묶음을 받아서 한번에 실행할 수있는 또다른 명령어인 MacroCommand 인스턴스를 만든다. MacroCommand는 명령어의 배열을 생성자를 통해 주입 받는다.
Line 27 : 리모컨의 0번 slot에 모두켜기 , 모두끄기 명령어를 탑재한다.
결과
7. 정리
명령어 패턴을 구현한다면 다음의 순서만 잘 지키면 되겠다.
1.리시버 ( Light , Stereo 클래스 )
실제 동작이 정의된 리시버를 구현한다.
2.커맨드 ( LightOnCommand 클래스 , LightOffCommand 클래스)
인보커(리모컨)에 탑재하기 위한 명령어 클래스를 만든다.
명령어 클래스는 리시버에 존재하는 기능을 활용하여 구현한다. 명령어의 일관성을 위해 Command 인터페이스를 구현하는 형태로 작성한다.
3.인보커( RemoteControl 클래스 )
setCommand 메소드를 통해서 인보커에 명령어를 할당받을 수 있도록한다.
명령어 클래스의 명령을 수행 할 수있는 메소드를 구현한다.
4.클라이언트 ( RemoteLoader 클래스 )
명령어 인스턴스를 생성하며, 생성자로 리시버를 주입한다.
리시버가 주입된 명령어를 인보커에 주입한다.
인보커는 명령을 수행하면 주입된 커맨드의 메소드를 실행한다.
커맨드의 메소드는 리시버의 메소드를 호출한다.
'개발 > 디자인패턴' 카테고리의 다른 글
| 디자인 패턴을 활용한 로그 추적기 만들기 - 1 (0) | 2022.06.12 |
|---|---|
| [Design Pattern] GoF's Builder vs. Joshua Bloch's Builder (0) | 2021.12.26 |
| [Design Pattern] 싱글턴 패턴(Singleton Pattern) (0) | 2021.03.05 |
| [Design Pattern] 팩토리 패턴(Factory Pattern) (1) | 2021.03.02 |
| [Design Pattern] 데코레이터 패턴(Decorator Pattern) (0) | 2021.02.05 |